Google Drive
Please read the Rclone Setup Guide first to configure your new backup storage:
Setting up Backup requires some basic know-how to use Terminal to perform the necessary configurations according to the instructions.
If you do not understand what you are doing, please skip this backup storage!
1.1 Client ID
In this step, we don't want to set our own client id, so press enter to continue
Option client_id.
Google Application Client Id
Setting your own is recommended.
See https://rclone.org/drive/#making-your-own-client-id for how to create your own.
If you leave this blank, it will use an internal key which is low performance.
Enter a value. Press Enter to leave empty.
client_id>
1.2 Client Secret
In this step, we don't want to set our own client secret, so press enter to continue
Option client_secret.
OAuth Client Secret.
Leave blank normally.
Enter a value. Press Enter to leave empty.
client_secret>
1.3 Scope
We want Reclone full control of our backup, we type 1 and press enter
Option scope.
Scope that rclone should use when requesting access from drive.
Choose a number from below, or type in your own value.
Press Enter to leave empty.

 1 / Full access all files, excluding Application Data Folder.
   \ (drive)
 2 / Read-only access to file metadata and file contents.
   \ (drive.readonly)
   / Access to files created by rclone only.
 3 | These are visible in the drive website.
   | File authorization is revoked when the user deauthorizes the app.
   \ (drive.file)
   / Allows read and write access to the Application Data folder.
 4 | This is not visible in the drive website.
   \ (drive.appfolder)
   / Allows read-only access to file metadata but
 5 | does not allow any access to read or download file content.
   \ (drive.metadata.readonly)
scope> 1
1.4 Service Account Credentials
We don't want to set our own service account credentials, press enter to continue
Option service_account_file.
Service Account Credentials JSON file path.
Leave blank normally.
Needed only if you want use SA instead of interactive login.
Leading `~` will be expanded in the file name as will environment variables such as `${RCLONE_CONFIG_DIR}`.
Enter a value. Press Enter to leave empty.
service_account_file>
1.5 Edit advanced config
In this step, we don't use Advanced Config to configure, so we type n and press enter to continue.
Edit advanced config?
y) Yes
n) No (default)
y/n> n
1.6 Auto Config
In this step, we are using a headless machine (your server), so we type n and press enter to continue.
Use auto config?
 * Say Y if not sure
 * Say N if you are working on a remote or headless machine

y) Yes (default)
n) No
y/n> n
2.1 Connect Rclone on your computer
You will see a highlight line in your process, just copy that line and continue to the next step.
Option config_token.
For this to work, you will need rclone available on a machine that has
a web browser available.
For more help and alternate methods see: https://rclone.org/remote_setup/
Execute the following on the machine with the web browser (same rclone
version recommended):
        rclone authorize "drive" "XXXXXXXXXXXX"
Then paste the result.
Enter a value.
config_token>
2.2 Token
The authentication token will have the format:
{
  "access_token": "xxxxx",
  "token_type": "Bearer",
  "refresh_token": "xxxxx",
  "expiry": "xxxxx"
}
2.3 How to get tokens (Windows, Mac/Linux)
- Windows (64bit)
- Mac
- Linux
For Windows, download Rclone at:
https://downloads.rclone.org/rclone-current-windows-amd64.zip
Then proceed to extract it; you will see a list of files; pay attention to the line rclone.exe:
README.html
README.txt
git-log.txt
rclone.1
rclone.exe
Proceed to open your Terminal in the extracted folder (Command Prompt | Commander | Tabby | Hyper).
I am using Tabby on Windows, then type the copied text in the above step:
rclone authorize "drive" "XXXXXXXXXXXX"
https://downloads.rclone.org/rclone-current-osx-amd64.zip
Then proceed to extract it; you will see a list of files; pay attention to the line rclone:
README.html
README.txt
git-log.txt
rclone
rclone.1
Proceed to open your Terminal in the extracted folder (Terminal | iTerm 2).
I am using iTerm 2 on Mac, then type the copied text in the above step:
./rclone authorize "drive" "XXXXXXXXXXXX"
https://downloads.rclone.org/rclone-current-linux-amd64.zip
Then proceed to extract it; you will see a list of files; pay attention to the line rclone:
README.html
README.txt
git-log.txt
rclone
rclone.1
Proceed to open your Terminal in the extracted folder (Terminal).
I am using Terminal, then type the copied text in the above step:
./rclone authorize "drive" "XXXXXXXXXXXX"
The Terminal will auto open this address using your browser.
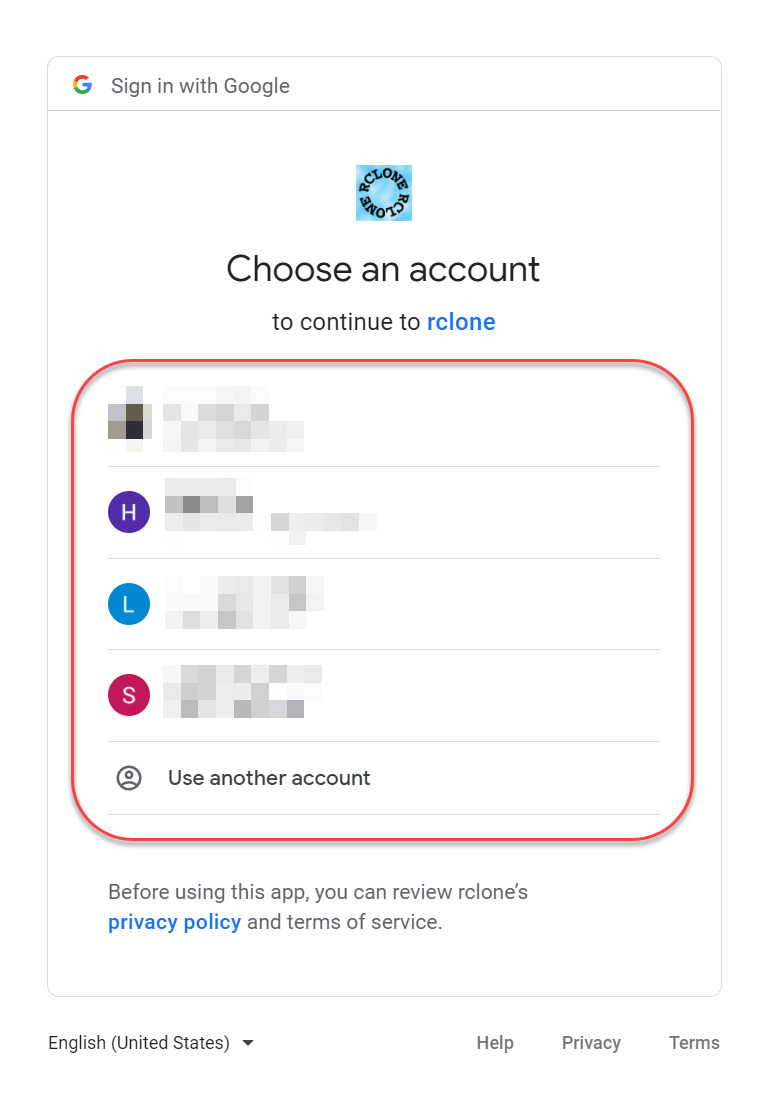
2.4 Select the account to connect
Select an account to connect to Rclone as shown below:
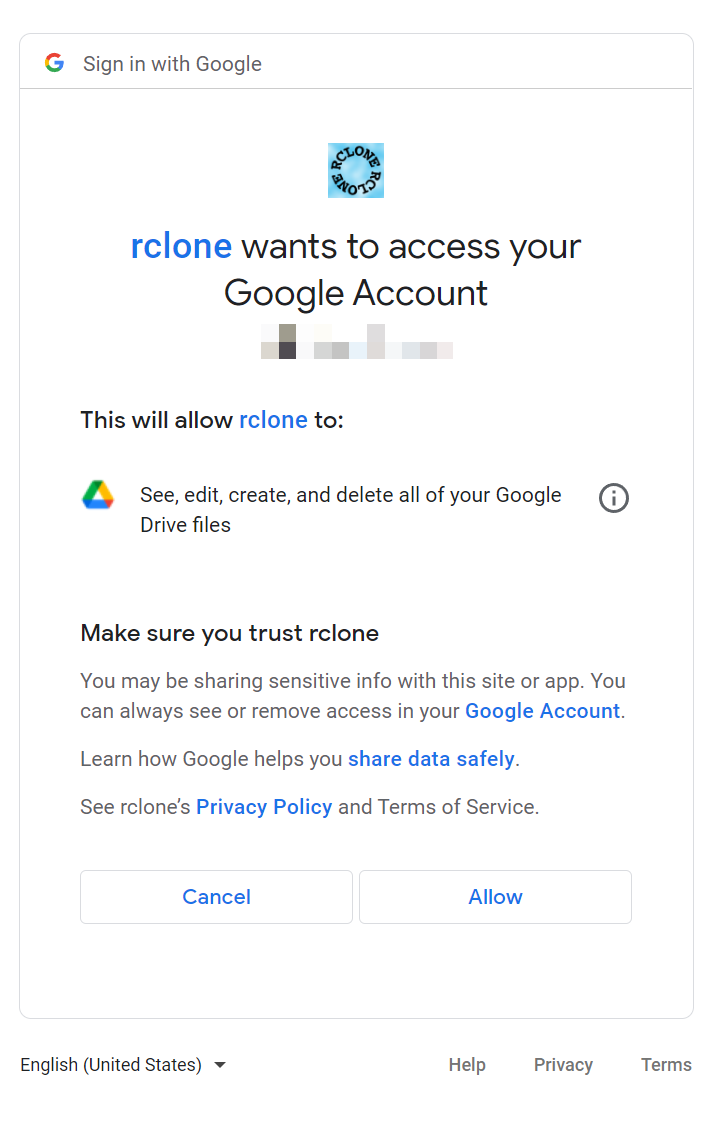
2.5 Confirm connection permission
Click Allow to confirm permission for Rclone to access your account's Google Drive.
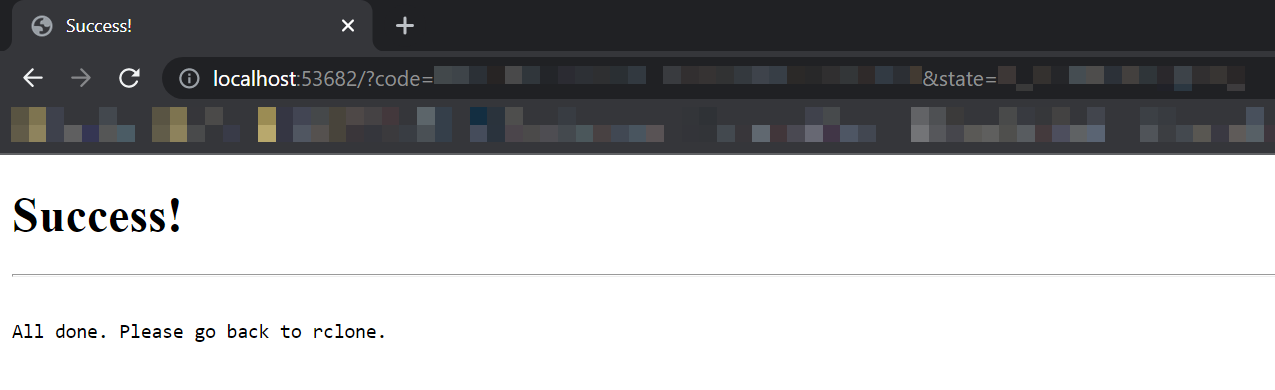
After completing the authorization process, your browser will automatically redirect you to an address that looks like: https://localhost:53682/?code=xxxxx&state=xxxxx
with the message: Success! All done. Please go back to rclone.
And on your Terminal window, it will show something like:
2021/10/08 17:50:58 NOTICE: Got code
Paste the following into your remote machine --->
eyJ0b2tlbiI6IntcImFjY2Vzc190b2tlblwiOlwieWEyOS5hMEFhNHhyWE9EYmZlaUhmM
<---End paste
You notice the 3rd line.
Our task is copy the content located between the lines Paste the following into your remote machine ---> and <---End paste to fill in the config token in the Step 2.1 then continue to the next step
2.6 Shared Drive
I don't want to use the shared drive. So type n and press enter to continue.
Configure this as a Shared Drive (Team Drive)?

y) Yes
n) No (default)
y/n>n
2.7 Confirmation
This step will display the information you have chosen to set up in the steps above.
After confirming the information is correct, press y and enter to ensure the completion of the connection process.
Configuration complete.
Options:
- type: drive
- scope: drive
- token: {"access_token":"ya29.a0Aa4xrXODbfeiHf17oKxn03EeQ_8X52","token_type":"Bearer","refresh_token":"4e1rH6PWpwLCdrwtrBtV4","expiry":"2022-09-20T18:40:14.268672+07:00"}
- team_drive:
Keep this "mybackup" remote?
y) Yes this is OK (default)
e) Edit this remote
d) Delete this remote
y/e/d> y
2.7 Finish
The last step will show the connections you have successfully added.
So we have completed the steps to connect to Google Drive to Rclone
Type q and press enter to end the process.
Current remotes:

Name                 Type
====                 ====
mybackup             drive

e) Edit existing remote
n) New remote
d) Delete remote
r) Rename remote
c) Copy remote
s) Set configuration password
q) Quit config
e/n/d/r/c/s/q> q
2.8 Authenticate with XVPS
At the end of our task, fill exactly in the following instructions item:
- Input the title for your new backup task (anything that you like).
- Select
Google Drivein the storage provider.- Input exactly
mybackupas I set inStep 1.4: Rclone Setup Guideinto theStorage Namefield.
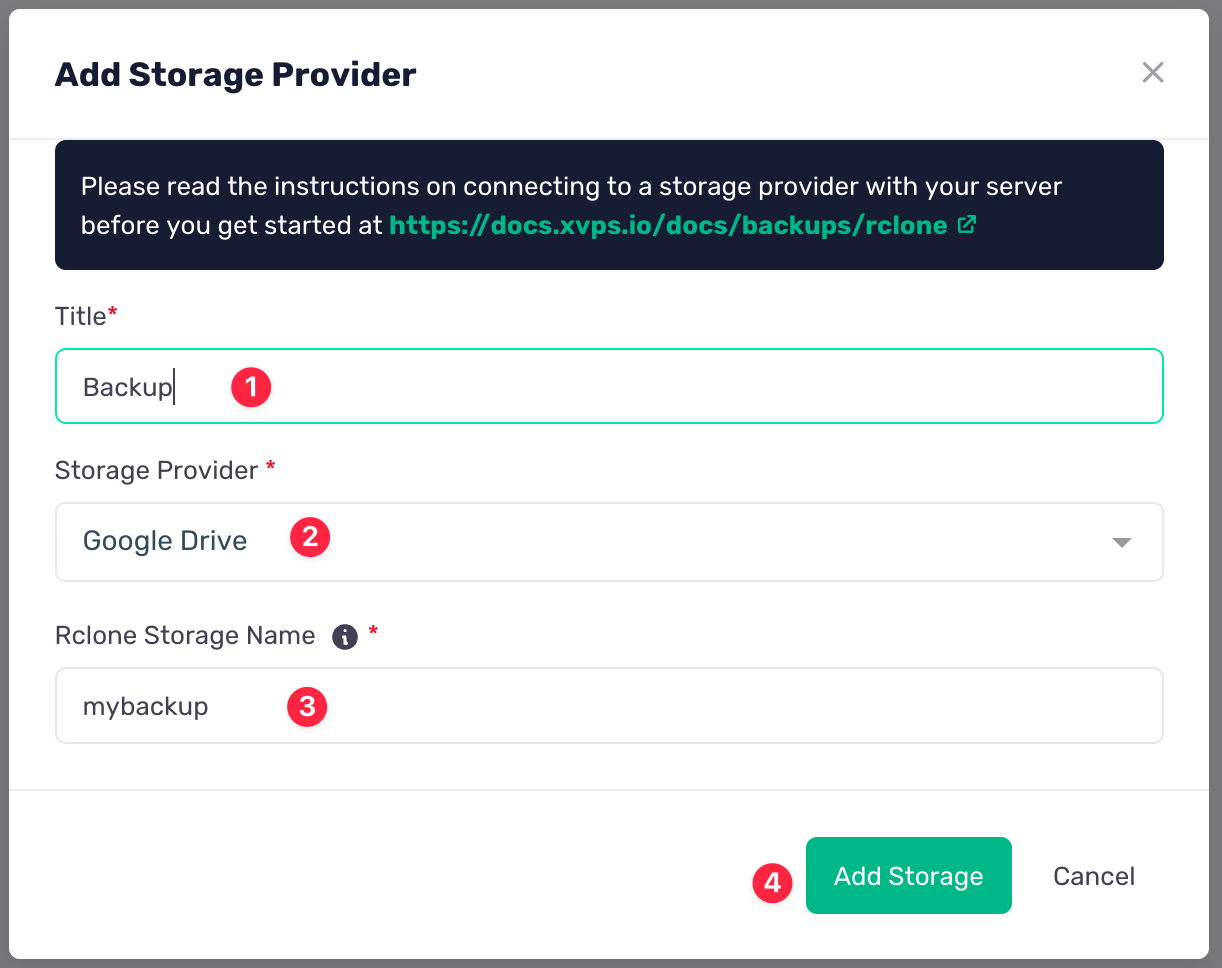
Carefully check the information after filling it in again. XVPS will check these information and throw an error if your information is incorrect
After that, click Add Storage and wait for confirmation from the system.
If you receive a successful message from the system; congratulations, your association with new storage has been successful.